Human Body Unit - Week 12 - Kidneys and Bladder

Week 12: We built a model of the kidneys and bladder.

Urea arrives at the kidneys from the liver containing blood, waste and water. It is their job to filter it and send the waste onto the bladder for removal from the body. David Macaulay's The Way We Work was our reference book for this project.

First we made urea by mixing lentils to represent the blood, water and yellow food coloring.

We used a clothes rack to hold up the parts of our system. The kids tied two water bottles with the ends cut off to the frame to represent the arteries carrying urea from the liver to the two kidneys.
The three parts of the kidneys; Cortex, Medulla, and Pelvis were represented by the colander, yogurt container and funnel. Both the Cortex and Medulla filter blood. Holes were poked into the bottom of the yogurt container so it would also function as a sieve.

Waste exits the kidneys via the pelvis. In our model the pelvis was a funnel. A plastic bag was taped to the bottom of the funnel to function as the bladder. A straw was poked through the bottom of the plastic bag and taped into place to function as the urethra. The kids pinched the straw in two places to stop the flow of urine. They were the internal and external sphincters.

After the set-up was complete, urea was poured into the kidneys.

It collected in the bladder. The blood (lentils) was collected in the Cortex and Medulla (colander and yogurt sieve) for use elsewhere in the body.

Once the sphincters were relaxed the bladder let loose into the potty.

Our other human body projects are easy to find on the Science Page.


* I did not receive any compensation for this recommendation. I'm just a homeschooling mom who has found many products that I like. If you're interested in the products I recommend on this blog I want to make it easy for you to find them. 
** I am an Amazon associate and receive a small portion of the sales on orders made after clicking in from this site, which I promptly spend on homeschooling books and supplies for my children.

Xerses - Persia Unit Study - Weaving for Kids

Week 4: We wove Persian carpets.

Xerxes was the last great Persian king. His soldiers crossed from Asia into Europe across the Hellespont (Turkey) on a bridge of boats. When a storm broke up the first bridge, he had his soldiers whip the water to punish it. Unfortunately for Xerxes, his immortal soldiers, which were though invincible, were defeated by the Greeks. The brave 300 is one of the most famous Spartan stories from history.

After learning a bit about Xerxes, we read a legend about Persian carpets. In The Legend of the Persian Carpet the king is very sad after his prized diamond is stolen. He misses the beautiful rainbow patterns created when light was reflected through the diamond. Carpets were very important to the ancient Persians and are still very important today.

For our weaving project we managed to use five different style looms with six children. 

Here are two great videos for weaving on a simple cardboard loom.
Basic Weaving
Simple Patterns and Designs

The circular loom was created in a similar manner. There is a small hole in the center of the cardboard circle.

This wooden, store-bought loom is similar to the Harrisville Designs Pegloom.

This loom was created from a shoe box lid by adding slits in the top of the cardboard. It functions just as well as the wooden loom.

The Harrisville Designs Style A Easyweaver is a little more advanced. This loom can be used to create items such as scarves and table runners.

The completed weavings were used as doll blankets, wall hangings, and coin purses.

If you haven't signed up to follow Highhill Education by email now would be a great time. Ancient Rome is coming next. Look for the sign-up bar on the right-hand side of the blog.


This post is linked to: 

* I did not receive any compensation for this recommendation. I'm just a homeschooling mom who has found many products that I like. If you're interested in the products I recommend on this blog I want to make it easy for you to find them. 
** I am an Amazon associate and receive a small portion of the sales on orders made after clicking in from this site, which I promptly spend on homeschooling books and supplies for my children.

Multiplying Fractions

My daughter has a riddle she loves to ask adults.

One time a mom made a pie for her four children. The first child came to her and asked for some pie. The mom said "you can have 1/4 of the pie." Then the second child came to her and asked for some pie. The mom said "of course, you can have 1/3 of the pie." Then the third child came to ask for some pie. The mom said "yes, you can have 1/2 of the pie." When the last child asked for some pie the mom said "you can have it all." Who got the most pie?

Answer: They all got the same amount.
 

Multiplying fractions can be a difficult mathematical concept to think of in terms of real life application. We multiply fractions when we want to take part of something. Here are a few examples.

One-half of a pizza is left over and three kids would like to share it. What portion of the pizza does child get? Answer: 1/2 x 1/3 = 1/6

It took 1 of a gallon of paint to paint a bedroom. A second bedroom of the same size needs to be painted, but 1/4 of it has already been painted. How much paint should be purchased? Answer: 1 gallon x 3/4 = 3/4 gallon

Here's the same problem with different numbers.

It took 2/3 of a gallon of paint to paint a bedroom. A second bedroom of the same size needs to be painted, but 1/4 of it has already been painted. How much paint should be purchased? Answer: 2/3 gallon x 3/4 = 6/12 gallon = 1/2 gallon

Here's one more example.
You want to make 1/2 of the cookie recipe which calls for 3 1/4 cups of flour. How many cups do you need? Answer: 1/2 x 13/4 = 13/8 = 1 5/8 cups


Math Curriculum Not Required

Is math a struggle? Why not ditch the curriculum and play some games?

It's my opinion that using a math curriculum with young children is not required. Learning addition, subtraction, multiplication and division is just more fun with games and real-life experiences and that's the majority of what's covered during the elementary school years.

Skills such as telling time, counting money, estimating, measuring and calendar skills are much easier to understand when they occur in the context of life. For the majority of kids, if they are involved in math related activities they will learn them. Kids are motivated to tell time once they realize that their friends will arrive at 3:00, or they will leave the house for dance class at 4:00. They learn to understand the calendar when looking forward to birthdays and holidays. Measuring is applied with a variety of crafts and they learn about money when they want to buy something from the store. As long as they are doing activities and an adult or sibling takes the time to help them understand time, money, measuring and other skills when questions arise, they will be learned without too much extra effort.

Therefore, just playing math games can go a long way for elementary level math. Once the basics are mastered, decimals and fractions can also be taught with games and experiences.

I've had similar conversations with two different friends recently. Basically I said something like what I wrote above and then listed a bunch of math games and activities. Actually it doesn't take a lot of games. Just a few basics will do. They cover the same skills and repetition is the key to basic math.


Counting
  • Uno Card Game
  • War - Divide a deck of cards between the players. Each player flips up a card and the player with the highest card takes them all. Repeat until one player has all the cards. If there is a tie when the cards are flipped up, three cards are placed face down and the fourth card is flipped up. The player with the highest card takes them all.

Addition/Subtraction

Multiplication/Division
  • Multiplication War - Same as adding war, but with multiplication.
  • Speed!  
  • Lost Cities
 Check out my Math Page, and these great blog hops for more educational activities.

This post is part of the Homeschool Help series. For more math help check-out what the other bloggers had to say.

Learning Flexibility Via Math - Barefoot Hippie Girl
Math is a Problem - What Now? - Every Bed of Roses
When Math Brings Tears - One Magnificent Obsession
Math, Tears, Frustration, Perfect Arithmetic - Hammock Tracks
How to Make Your Child Fall in Love with Math - Navigating by Joy


Human Body Unit - Week 11 - Pancreas

Week 11: We learned how glucose is controlled in the blood by making a model of the system.

Using wooden blocks and other toys we created a model of how our bodies control sugar. Hypoglycemia and diabetes are two common diseases that result from the bodies inability to control sugar. Working our way through this activity helped us better understand these conditions. David Macaulay's The Way We Work explains the process very well.

The first step was to build a capillary lined with Alpha Cells (green), Beta Cells (red), Liver Cells (brown) and Tissue Cells (blue).

The Alpha Cells were filled with Glucagon. The Beta Cells were filled with Insulin.

Glucose and glucose receptors were represented with chain links. Glucose receptors (blue chain links) were placed on the fronts of the Alpha and Beta Cells. Glucagon Receptors (blue bar links) were placed on the fronts of the Liver Cells. Insulin Receptors (red bar links) were placed on the fronts of Liver and Tissue Cells.

Glucose was placed in the capillary. Then we modeled how our bodies handle large amounts of sugar in the blood right after meals.

 First the Glucose Receptors on the fronts of the Alpha and Beta Cells fill up because there is lots of glucose in the blood.

This causes the Beta Cells to release insulin.

The insulin bonds to the Insulin Receptors on the fronts of the Liver and Tissue Cells. The glucose follows the insulin into the cells. In the Liver Cells it is linked together and stored as Glycogen. In the Tissue Cells it is burned and used for energy.

That's it for high sugar levels after meals.

Next we repeated the process for low sugar conditions. This happens in between meals.

Since there wasn't much glucose to bond with the Glucose Receptors on the fronts of the Alpha and Beta Cells, the Alpha Cells released their Glucagon.

When the glucagon bonded with the Glucagon Receptors on the fronts of the Liver Cells the stored Glycogen inside the Liver was broken down and placed into the blood stream.

The broken down glucose entered the Tissue Cells to be burned as energy.

To see more of our human body projects please visit our science page.


This Post is Linked To:
Reading Confetti
We Made That
True Aim Education
It's Playtime

* I did not receive any compensation for this recommendation. I'm just a homeschooling mom who has found many products that I like. If you're interested in the products I recommend on this blog I want to make it easy for you to find them. 
** I am an Amazon associate and receive a small portion of the sales on orders made after clicking in from this site, which I promptly spend on homeschooling books and supplies for my children.

Persia Unit Study - Battle of Marathon

Week 3: We tried to run as far as Pheidippides.


Darius attacked the Greeks at Marathon. Before the battle began Pheidippides ran 150 miles to Sparta to seek assistance. The Spartans were busy with a celebration and promised to be there in a few days. Meanwhile, the Athenians battled with Darius' troops and won a great victory losing few men to Darius' thousands.

We watched this video on the Battle of Marathon. It uses video game technology to create an animation of how the battle was fought.

After the battle Pheidippides ran 26 miles to Athens to bring news of the victory. Nobody is certain if this story is real or just a legend, but the kids got a better idea of how far he ran.

I run quite frequently, so planned to take the kids out on alternating days with me. They are good runners, but I didn't want to get stuck walking a long way back. The plan was to run every other day with each child while slightly increasing the distance.


The first day we completed a loop and then drove the route with the car to determine the distance; 3.8 km. The second day the distance was increased to a loop of 5.8 km. My son ran 4.9 km before needing to rest. My daughter made it to the third day and completed the entire 8.5 km loop before she decided that was enough running for her. Although it was much less than the 26 mile (42 km) Pheidippides ran, it was excellent for a child.

To see more of our history activities please visit our history page.


This post is linked to: 
Hammock Tracks

Math Art for First Graders

Patterns are very mathematical. Creating interesting designs can be a fun way to explore math.

My eleven year old has been creating math art all year and my six year old has been watching closely. She surprised me with her own math art designs. These drawings were created using stencils.

The gaps between the stars form parallelograms. The lines surrounding the center star form a pentagon. Pentagons have five sides and stars have five points.

In this drawing, the center circle is surrounded by six hearts and the hearts are surrounded by twelve circles. There are exactly twice as many circles as hearts.

Other math ideas can be found on our Math Page.


Patterns in Knitting

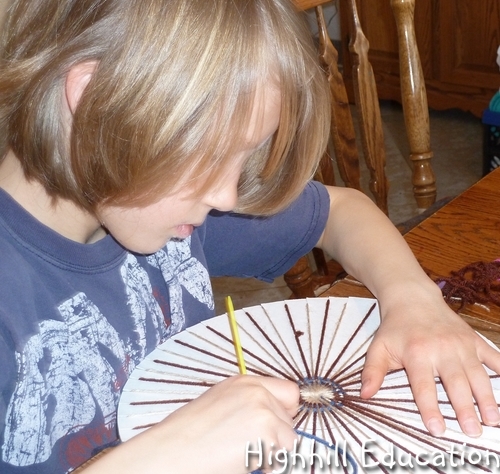
Did you know that knitting and math have a lot in common? Estimating, measuring....... and PATTERNS! It recently dawned on me why I love knitting. I love patterns. That’s what knitting is.

Knitting is really very simple. There are six basic steps to learn. Casting on and casting off get a project started and finished. Increasing and decreasing are techniques used to add shape to the designs. Knit stitch and purl stitch are what’s done in between. Many patterns are created with various combinations of these two simple stitches and a bit of increasing and decreasing.

Here are some examples of patterns created with knitting and purling.

These leg warmers were knit in the round. At the base the pattern was knit one stitch, purl one stitch. The main portion of the leg warmers were plain knitting stitches. The top portion was also plain knitting stitches with a fancy yarn.

This hat was knit in the round. The pattern was knit 10 rows then purl one row (light pink). Then decrease stitches were used at the top to close the hat. (All you do to decrease is knit two stitches together.) The decreasing portion was another pattern. The first round was knit 9, knit 2 together. The second round was knit 8, knit 2 together....... and so on until there were only 4 stitches.

This Kindle case was a simple knitted rectangle much like a scarf. The pattern consisted of  knitting stitches with a few purl stitches to create the diamonds. ----- It went knit four, purl one, knit eight, purl one, knit four for the bottom row, then knit three, purl one, knit two, purl one, knit six, purl one, knit two, purl one, knit six, purl one, knit two, purl one, knit three. ----- In each row the increments between the knitting and purling stitches changed. Although it looks complicated, it is nothing but knitting and purling. No increasing or decreasing required. Plus another fun pattern to work with.


Seed Stitch and Ribbing – The ribbing at the base of the leg warmers and the seed stitch at the left side of this photo were both created by knitting one stitch then purling one stitch. The difference is that in ribbing the stitches are lined up and in seed stitch they are staggered.

To go from creating patterns using various combinations of knit and purl stitches to including cables is easier than it looks. The trick is the a cable needle. It is used to change the order of the stitches. Cables seem to jump out from the project. Often when creating a cable the entire row is knitted. Then in the location that the cable is desired two stitches are placed on the cable needle so that stitches behind them in line can be knit first. Holding the cable behind the knitting will make the cables twist to the right and holding the cable needle in front of the knitting will make the cables twist to the left. Repeating the use of the cable needle over the course of several rows makes the cable appear.
The base of this sweater contains a pattern of knit two, purl two ribbing. In the body of the sweater the pattern is
knit ten, purl two, knit two, purl two, knit two, purl two, knit ten for many of the rows and
knit ten, purl two, (knit two, purl two, knit two) - change the order of these stitches using the cable needle - instead of what's in parenthesis put the first two stitches on a cable needle and hold them in the back, (purl one, knit two, knit the two on the cable needle, purl one), purl two, knit ten. Pretty cool huh?

Well if all that is a bit confusing fair isle is another pattern technique that doesn't involve the cable needle and all of the stitches are knit. In fair isle the patterns are created using two different colors per row. Almost all of the stitches are plain knitting stitches on the front side and plain purling stitches on the back side. Here are some patterns that can be created using fair isle techniques.

Two balls of yarn were attached to this knitting project where the two colors were desired. Instead of knitting with one color the two balls of yarn were alternated. The pattern was knit two white, knit two purple.

There were different patterns required for each row of the fair isle hat and mittens, but all the stitches were knit stitches. The first row using black at the bottom of the hat was a fun row because it was knit one black, knit one pink.

These mittens contain many different colors, but each row only contains two colors of yarn. Again all the stitches were plain knitting stitches. For the bottom red and green row the pattern was knit one green, knit one red. For the middle row it was knit two green, knit one red.

Fair isle and cable knitting are fun because they are all about patterns. Plus the designs are interesting to create. If you have the basics down I highly recommend trying out these techniques.

There you have it...... Math and knitting are forever linked. 


This post is linked to: 
Horrific Knits
Pin Me Linky
Yarn Along
Related Posts Plugin for WordPress, Blogger...